Monday, April 25, 2011
Happy Easter!
We had a great time celebrating Easter yesterday. Our last holiday as a family of three! Matthew was very excited to see what was in his Easter basket and has become quite an expert at egg hunting! Here are some videos from our day.

Monday, April 18, 2011
Nesting with No Nursery... Part 3
In addition to making things for our new arrival, I've also been making things for Matthew to play with. A few months ago when he started pointing out numbers everywhere, my teacher personality kicked in and I decided to make him some felt flashcards. One set with numbers and one with shapes. They came out really cute, except for the fact that Cajun's dog hair sticks to them like crazy!


Then a few weeks ago he started identifying letters, so I thought I should make something with those on them! 26 flashcards on a ring wasn't exactly an option, and then I remembered I had bought some Cars fabric a while back and had nothing to do with it. Alphabet bean bags were born! I painted uppercase letters on one side and lowercase letters on the other with fabric paint. Matthew loves them. He tries to carry as many of them in his arms as he can at one time! He transports them all from the table to the couch (handfuls at a time) and then takes them from the couch and throws them on the floor. All of this picking up got old fast, so I decided I needed a bag to keep them all in. I had a little fabric leftover and made a matching drawstring bag!


I have one last project that I want to complete before the baby comes, so hopefully I'll have time in the next few days. I'll keep you posted!
Sunday, April 17, 2011
Construction on Our New House!
Brian and I are very excited to be building a house in Bradenton! After spending a week looking at resales and not really finding anything we liked, we decided to go with new construction after falling in love with one of the builders in the area, and discovering it was actually less expensive to build! We told the builder that we would be moving at the end of June, and they assured us that the house would be done on time. We are/were very skeptical about this, but were willing to take the risk. They broke ground on our house on April 4th, and just 13 days later they are almost about to put the roof on! Maybe it will be done in time after all...
Here are some pictures of the progress:
April 4, 2011


 April 17, 2011


Here are some pictures of the progress:
April 4, 2011


Tuesday, April 5, 2011
Nesting with No Nursery... Part 2

This is something that I've been wanting to make since I saw it on a crafting blog (How Does She) about 6 months ago. I told myself that I would do it before Matthew's 2nd birthday, so that I could start measuring his height every year. Well, that deadline was fast approaching so I thought I'd better get to it! And while I was at it, I made one for the baby too even though I probably won't be measuring her height for quite some time. I took pictures as I went so if any of you crafty people out there want to try it you can! I made both of mine while Matthew took his nap this afternoon, so in about 2 hours. One of the things I like about it is that you can take it with you, so when we move again in the future we won't leave behind the measured marks on a door frame or wall never to be seen again.
Supplies you'll need:
- 3" wide x 1"deep MDF board cut in half. The boards come in 10 or 12 foot lengths, so I just had the guy at Home Depot cut in half for me, and then I had two! Perfect for making two charts :o)
- Wooden topper
- Acrylic paint
- Tape measure
- Ruler or straight edge
- Pencil
- Permanent marker
- Numbers 1-6 in vinyl
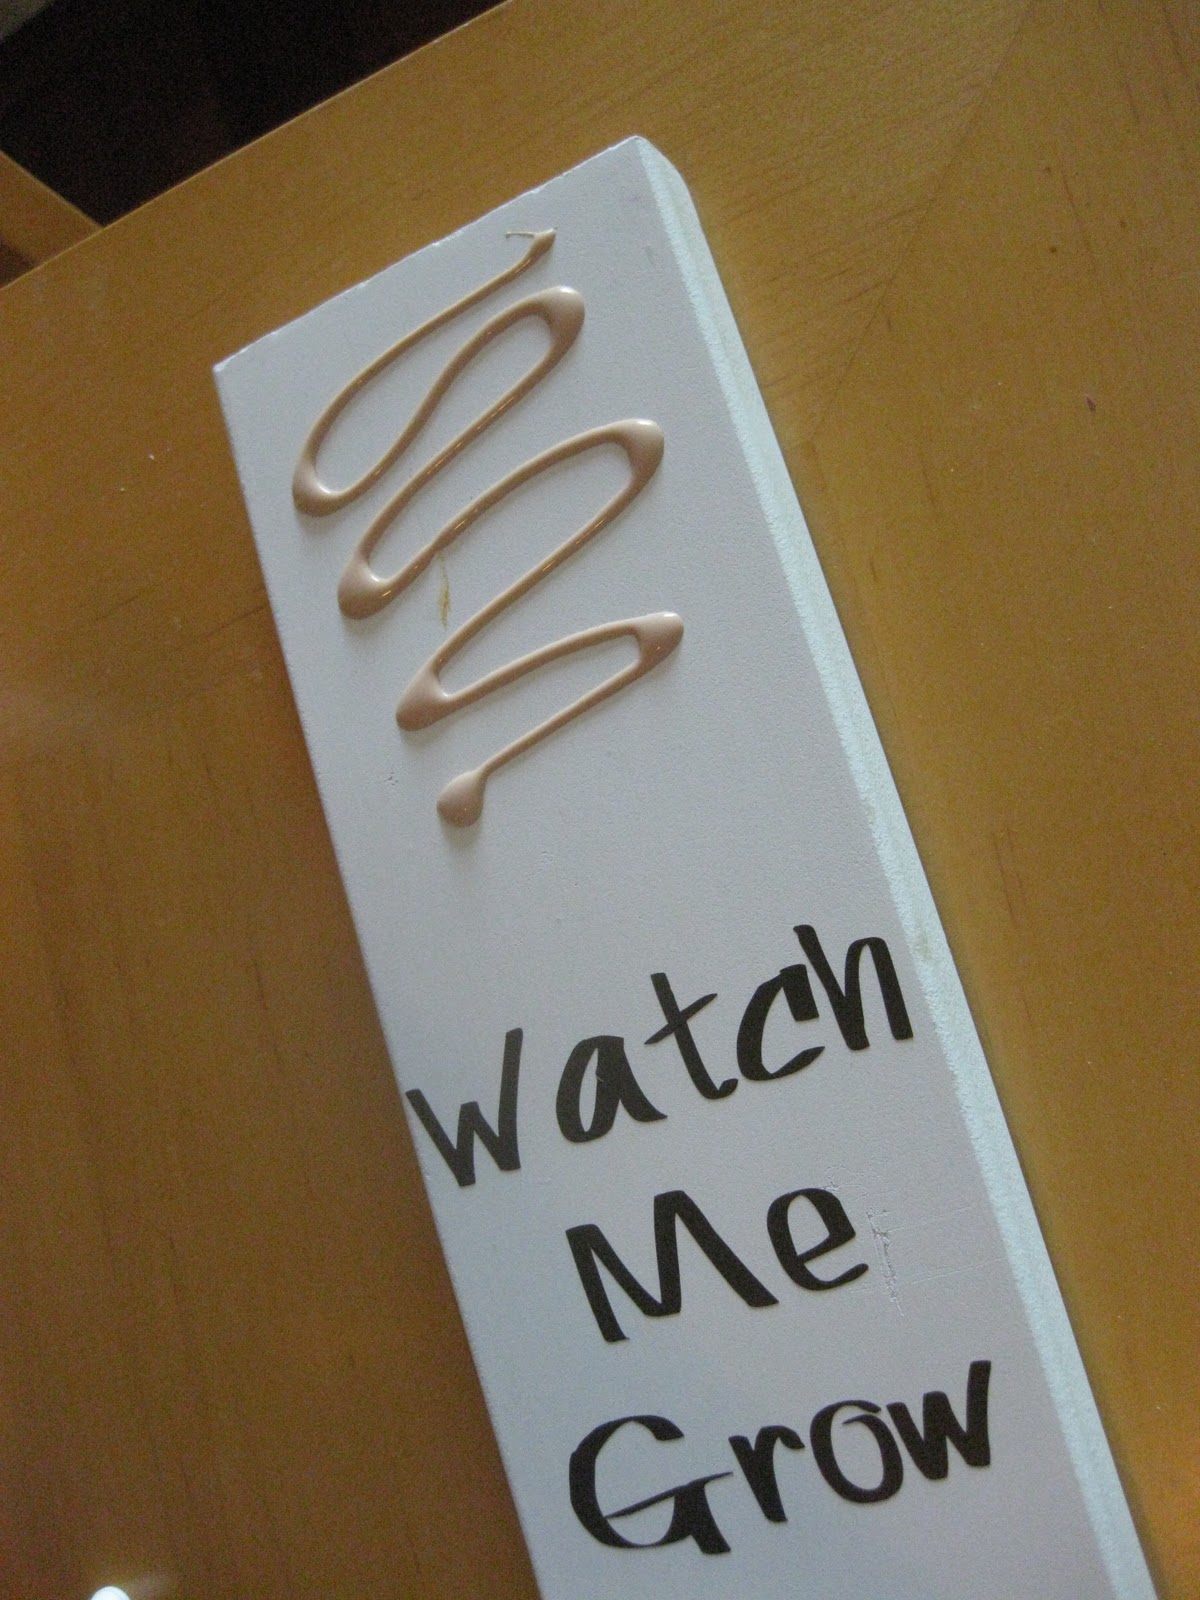
- "Watch Me Grow" phrase in vinyl


The next step is to mark the measurements on the MDF board. Now keep in mind that the growth chart will not start from the ground up - it will be about 10 inches off the floor. This is so if you have baseboards it will still be able to hang flat, and it also allows you to get more height on the chart. I did my measurements by placing the topper where I thought I'd like it, leaving space for the "Watch Me Grow" phrase, and then starting with my highest measurement. My charts go up to 6' 2", but you can make yours go taller or shorter depending on the height in your family. I am slightly anal and didn't want to mess up, so I used a pencil to make all of my marks first. I used the tape measure and just marked inch increments. At this point I didn't worry about where the numbers would go, I just marked all the way down the board.


I have a Silhouette machine, so I used it to cut out the numbers and words from vinyl. I made the numbers about 2 inches high, and the entire "Watch Me Grow" phrase was 3 inches wide and 4 inches tall. If you don't have a Silhouette machine you can hand write everything, or you can visit my crafting site www.cupcakesandjellybeans.com and order just the vinyl to put on your growth chart. Place the numbers directly next to the longer lines and the phrase at the top! The font I used for the train chart is called "A Little Pot" and the font for the butterfly chart is "Rolina".

The last step is to glue on your topper! I did this last in case I ended up needing to move it up or down to make more room for the numbers or phrase. Use wood glue and just stick it on!
The last step is to put a picture hanger on the back! You can buy one at Home Depot, or if you're like me you have random things around your house and already own one. Just hammer it into the back once your wood glue is dry, and you're all done. Now all you have to do is hang it on the wall! But don't forget to measure from the ground to the 1 foot mark to make sure your measurements are accurate when you hang it!


Saturday, April 2, 2011
Nesting with No Nursery... Part 1

I was originally planning on buying a cheap, open frame for this project (since you paint it anyway) but I stumbled upon this 12"x18" shadow box in the "As Is" section at Michaels one day and thought it would be perfect! I think it was in there because the glass had broken and was gone, but I didn't need the glass anyway. It only cost me $6.00! It's hard to tell in the picture, but the frame stands out about 3 inches from the back, and the background was made as a pegboard or corkboard covered in fabric.

The first thing I did was remove the back from the frame and paint the frame brown to match my fabric. Ideally I would have used spray paint, but since I have no garage or driveway, I just used regular acrylic paint. You could use leftover paint you have in your garage as well.

While the frame was drying I made the inside. I laid the frame insert on top of a piece of corkboard and used box cutters to cut out a section that was the exact same size. Since it has to fit in the frame, it is very important that it's exactly the same size. (I forgot to take a picture of that step!) Since the shadow box I bought was already made out of corkboard, I only used one thin piece. If you are using an open frame or a regular frame, you will want to cut two pieces of corkboard and hot glue them together to make it thicker.
Then I laid out my fabric, put the piece of corkboard on top of it, and cut out a section of fabric that was three inches wider on each side. To cover the corkboard I folded the fabric over the edges and secured it with pins. It is very important to pull the fabric tight and make sure the pattern is straight on the other side, so the pins give you a little flexibility if you need to make adjustments.


To permanently fasten the fabric you can use either a staple gun or (if you're like me and don't own a staple gun) hot glue. Just make sure that the fabric stays pulled tight while you glue. Once the fabric was in place, I put the newly covered corkboard and the original frame backing back into the frame!

This is now a cute decorative pegboard that you could really use for anything. I decided to make mine into a hair bow holder, so here's what I did next! I had been looking for some cute, coordinating pins to use but hadn't found anything that thrilled me. Then I realized I can make my own! I had some old, flat tacks in a drawer that I used as a base. Then I went through my crafting supplies and found some things that I could glue to them. I made two bows, a flower, and two jeweled pins.

To actually hang the hair bows in the frame, I used three strips of ribbon that the bows can be clipped to. Right now I just have three ribbons, but as I accumulate more bows I can add, change, and move the ribbons around as needed. That's the beauty of the corkboard! I didn't need to two pins with bows yet, so I just used them as a decoration in the corner for now.

Clip on your hair bows, and voila! Cute hair bow holder! Unfortunately mine is now sitting in a closet until we move and I can hang it in the baby's nursery. One other thing I am planning to add is her first initial either in the bottom corner where the bows are or at the top in the center. Since she doesn't have a name (and won't until she's born) this will have to wait a bit.
All in all this project cost me $8.00 for the frame and corkboard. The rest of the supplies I already had at home. I hope you enjoyed my post, and maybe I've inspired you to make something as well! If so, leave a comment and link below so I can see your cute ideas!
Subscribe to:
Posts (Atom)